Growing fodder at home is a great way to provide fresh, nutritious food for your livestock. Not only is it cost-effective, but it also reduces the need for store-bought feed and helps to improve the health and well-being of your animals. In this blog post, we will go over the steps and materials needed to successfully grow your own fodder.
1. Choose the right seeds: The first step in growing fodder at home is selecting the right seeds. There are a variety of options available, including barley, wheat, oats, and rye. Each has its own set of benefits, so it’s important to research which seed will work best for your particular type of livestock. In this post, I will be using Barley seeds. You want to make sure you choose the Barley that has the hull intact.
Prepare the growing tray: Once you’ve chosen your seeds, you’ll need to prepare a tray for growing. I like to use aluminum trays and poke holes in the bottom for drainage. You can sit it inside another tray without out holes so it can catch any excess water.
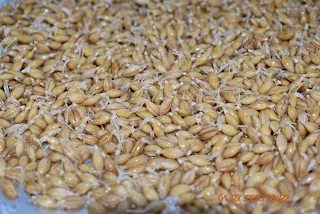
Soak the seeds: Before spreading the seeds in your tray, they should be soaked in water for 24 hours. This will help to soften the seed coat and encourage germination.
Spread the seeds: After the seeds have been soaked, they can be placed in the tray. The seeds should be spread out evenly across the tray.
Water the seeds: The seeds should be kept moist but not waterlogged. A spray bottle can be used to mist the seeds with water, or a small amount of water can be added to the tray. Make sure you add a tray to the bottom without holes to catch the water draining from the first tray.
Provide light: Fodder needs a lot of light to grow, so the tray should be placed in a sunny location or under grow lights.
Harvest: After 7-10 days, the fodder will be ready to harvest. It should be removed from the tray and fed to your animals immediately. I like to reuse my trays so I don’t leave the tray in the coop or the chickens will beat it up.
By following these steps, you can successfully grow your own fodder at home, providing your livestock with fresh and nutritious food. Remember to always keep an eye on the moisture level of the tray, as over watering or under watering can greatly affect the growth of the fodder.
As a reminder, the above is just a basic guide and it’s important to research more on specific seeds, trays, and other materials that suit your region and livestock better.
DAY 1
DAY2
DAY 3
DAY 4
DAY 5


Comments
Post a Comment